Kitchen Renovation
 After a week of sorting through someone else’s memories and getting my little cabin stripped back I’ve started the renovations! I’m going to record a weekly update, as much as I can, the format being for each room
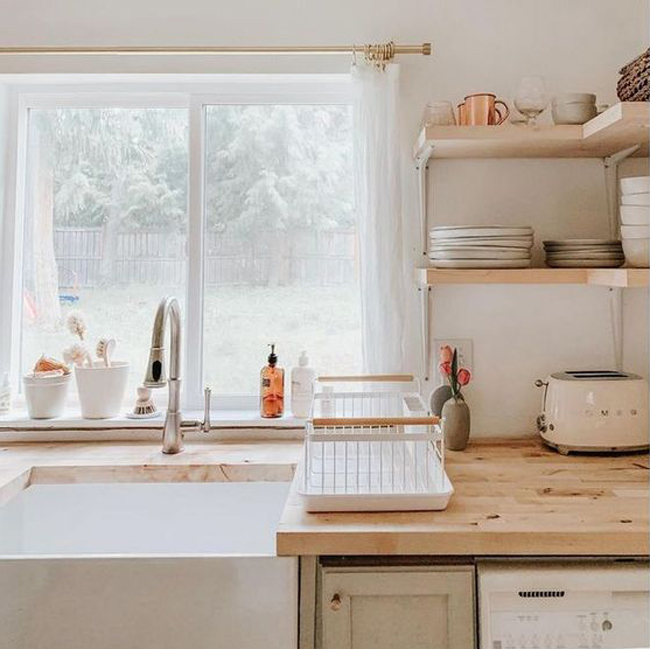
- ideas of how I want it to look aka what I found on Pinterest (kitchen area the “look”)
- the reality of what’s achievable
- what worked, what didn’t
- hints and tips
Pinterest -v- Reality
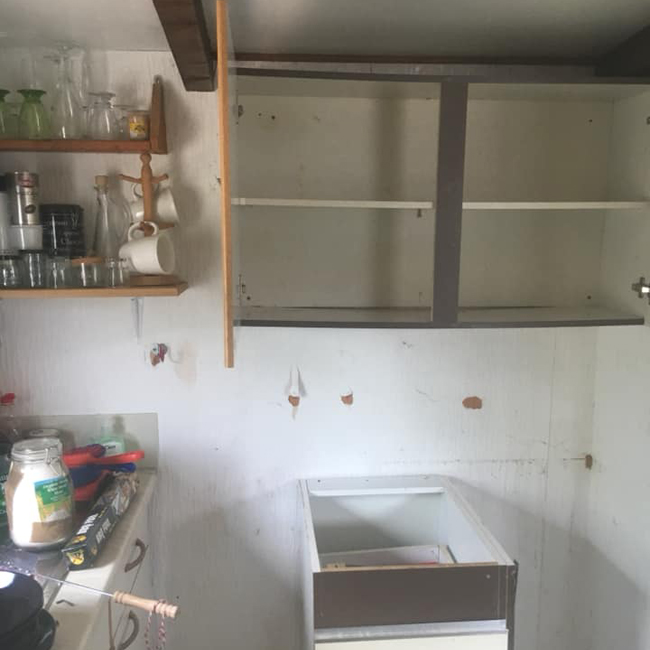
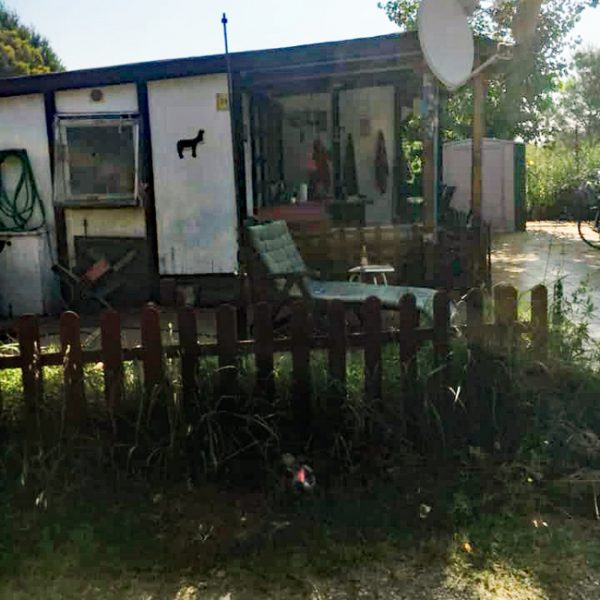
The tricky part of any renovation is matching reality with the Pinterest image you have in your head. My ideas for the kitchen space, and throughout the cabin, is to make the small space as light and airy as possible. I’m going for a beach house feel. For practical reasons I need to tackle each area separately so I have room to manoeuvre. Starting with the kitchen, this was the area with the most stuff in it. My first job was to strip out all the shelving and surplus cupboards and their contents.
Bin it, donate it, salvage it
On plan I binned the broken, gave the unusable or surplus to charity and salvaged shelving and a double cupboard. I am chopping the cupboard in half to create two single cupboards to go one at each end of the window wall above the floor units. I’ll be storing the shelving in the utility for future reference.
 Reality bites!
Then I made this amazing discovery. Underneath the tired blown vinyl wallpaper was the original wood planking walls! This is where the Pinterest world and reality world collided. I thought WOW! These are going to look amazing whitewashed. I logged on to YouTube and started watching videos on how to whitewash using a variety of techniques. From dry brushing chalkpaint – way too expensive, to watered down emulsion – varying proportions giving different effects. It all seemed so easy. 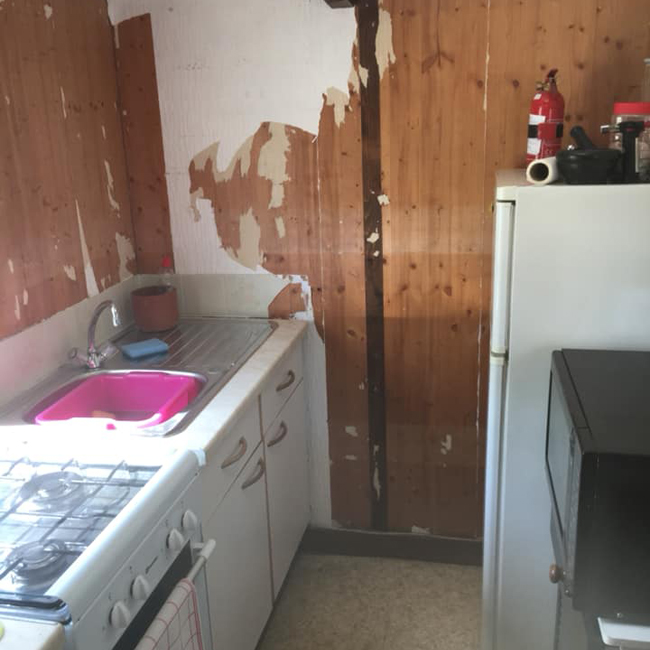
The pictures on YouTube and Pinterest didn’t do me any favours in the expectation stakes. Was it because everything looked professionally finished with the right placement of accessories, lighting, angle and photoshop? Even my photos looked way better than the reality, or, can I admit I just couldn’t master the technique.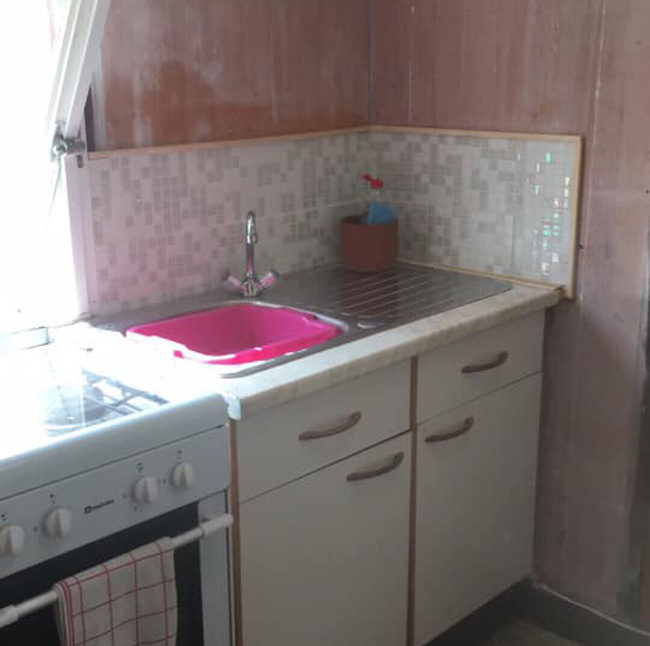
First attempt. The reality is that the area where I experimented with this whitewash malarkey looks like I painted it with watered down emulsion and dragged a dirty dishcloth over it. 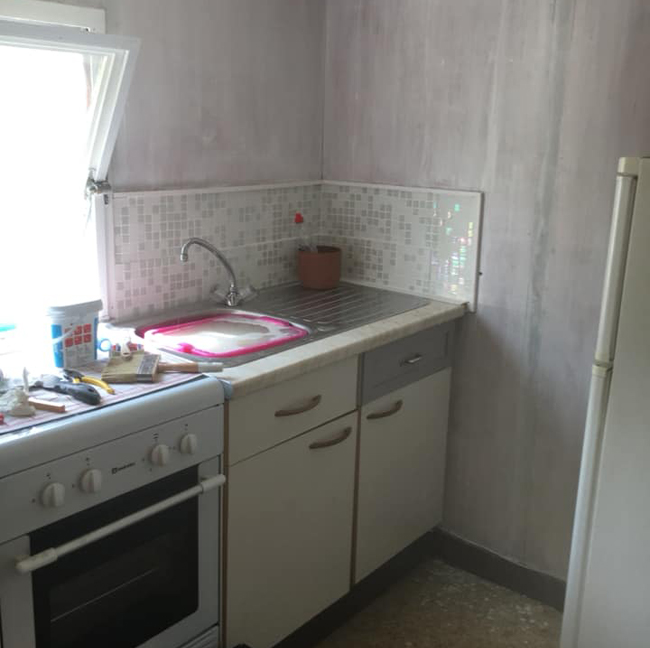 Second attempt. Looks like I’ve never painted a wall in my life. I had streaks, drips, and no matter how many times I went over it with a dry four inch brush made any difference. That just left start and finish drag marks top and bottom no matter how many times I did it. I look at my effort and think it resembles one of those Nailed It projects that most definitely haven’t nailed it. Shabby it is chic it ain’t, ship lap wallpaper is on order and will go up once all the woodwork and ceilings are painted!
What worked – Bargain basement buys and upcycling
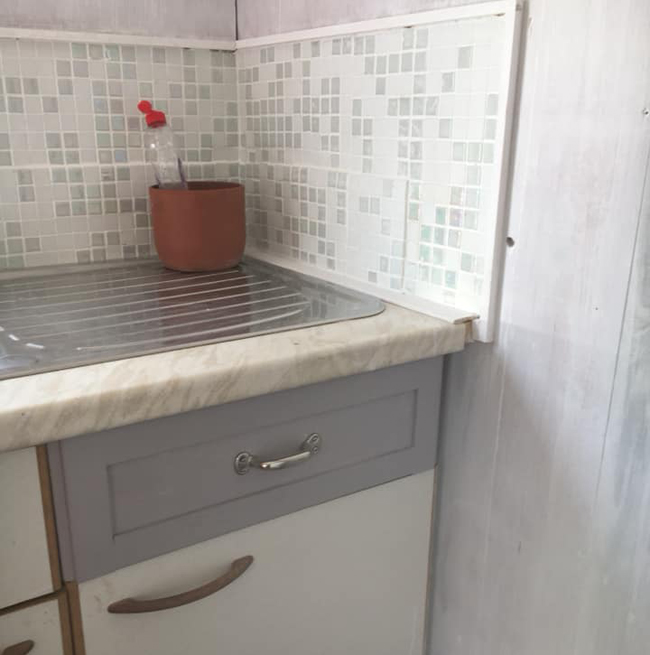
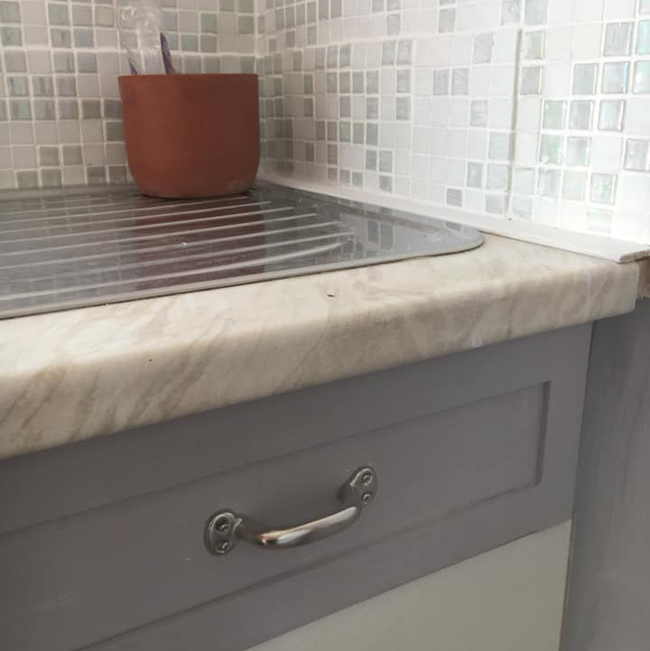
On a positive note the mosaic tiles from my garage stash of stuff I bought-on-the-cheap-that-will-one-day-come-in-handy went on a treat. None of that trying to cut tile rubbish just snip out the tiles from the backing netting around things like plugs and such like, easy peasy. However, grouting was laborious, I’ve got grouters repetitive strain in my hands. There are so many crevices to fill but am super pleased with the finished look. I also framed around them using square dowel to give a nice crisp edge.
Thumbs up for the upcycling!
I’m chuffed to bits with how the kitchen units are looking. I thought I’d start with one of the drawers, easy to dismantle and work on at the outdoor table in the breeze.
I removed the original handle and cut a piece of white Fablon to size to create a nice flat surface. Then I cut some thin planking with a tenon saw, remember to measure twice cut once. This was then fixed in place with No Nails type double sided extra strong glue tape, marvellous stuff no mess and instant fix. I gave it a liberal coat of grey chalk paint, measured and centred a new handle and screwed it all back together. I just need to give it a coat of wax. Definitely a thumbs up and will be replicating this on all the units.
What didn’t work
I’ve had a few mishaps on the road of renovation. In one week I have managed to slice a finger and not having plasters to hand resorted to kitchen roll and duct tape. Then I cut through an electric cable and took out the power to my place and next doors for half an hour before we got it back on again. Finally, I left my keys in my car with the engine ticking over and the aircon on full pelt and was a teaspoon close to being out of fuel before I realised. Maybe I’ve been going at it a bit full pelt so this week am having a day off and doing some of the unit renovations at home.
What I’ve learnt this week
- Shabby chic can sometimes just look shabby – it’s great to experiment but if it’s not working move on
- Keep a stock of plasters in
- Check for cables when drilling or cutting into walls
- Always put your keys to anything in a safe place
- Second hand stores, charity shops and bargain bins are great places to find stuff that might one day come in handy!
- The path to Pinterest perfection is littered with reality checks but keep the faith!


2 Comments
Glennis
Looks like it’s coming along in leaps and bounds! I’m looking forward to being able to visit it. . . .
annemarie
…I am so looking forward to you coming to visit it next Spring, hopefully!